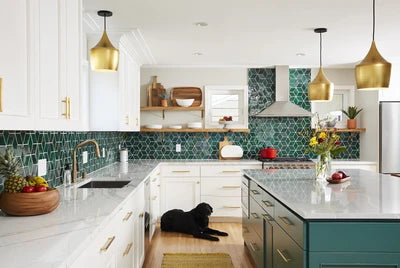
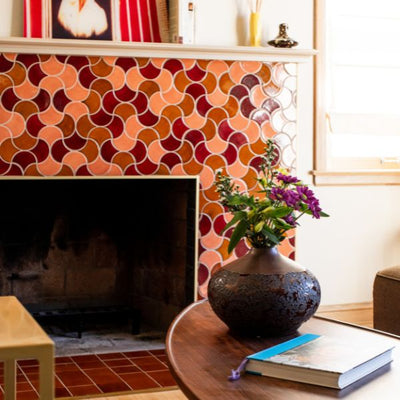
When planning your next renovation project, tile transitions sometimes end up being a pesky afterthought. Planning your tile transition and tile edge trim from the beginning can save you time and frustration.
Tile transitions aren’t as simple as installing a tile trim piece when it’s flooring you’re dealing with. Since tile often meets carpet or hardwood flooring, you need transitions. Let’s talk through how to visualize your space, the aesthetic and functional considerations, and some of our favorite creative tile transition ideas.

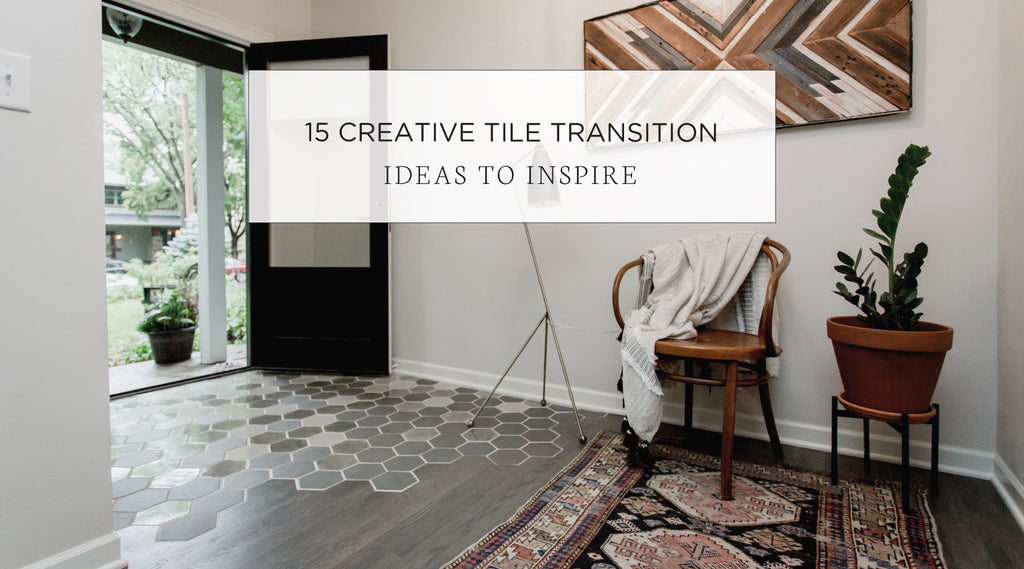
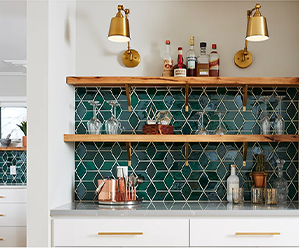
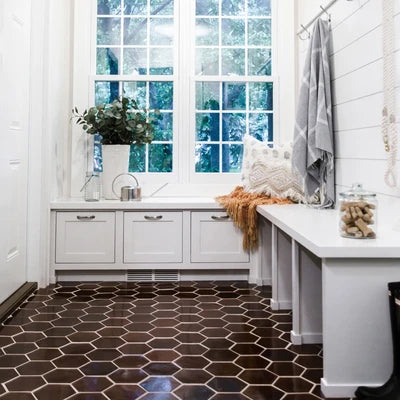
Large Hexagons - Chestnut
Interior Design - Emily Pueringer
Photography - Rubinski Visual
Installation - Quality Cut Design | Remodel
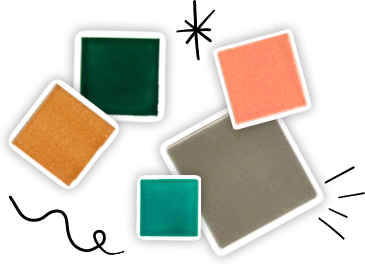
Explore Mercury Mosaics sample packs to experience the look, and feel the difference of handmade artisan tiles for your mid-century modern designed home.
Visualizing Your Perfect Tile Transition
To complete a perfect tile transition, sketch out your idea by hand or use digital software so that you can better visualize the final result. This will help you map out the layout and colors, patterns, and textures that will interact well with the overall space and design motif. As you visualize the space, it’s important to consider all sightlines and not just the aerial view. The more planning and visualization you do in advance, the less likely you will be to make costly mistakes.
15 Creative Tile Transition Ideas
Tile transitions can transform a space and are a great opportunity for you to think outside the box. You can get as creative as you want, creating a truly personalized space or something more conventional.
All of our creative tile transition ideas involve mixing up color, pattern, texture, and layout in unique ways. Whether you want a bold statement piece to add depth and interest or something more simple and minimalistic, we’ve got you covered. Let’s dive into some of our favorite ideas that you can incorporate into your next tile project.
Tile Transition to Wood

Large Hexagons - Custom Colors: Light Grey
Photography - Chelsie Lopez Production
Tile installation - Kinetic Design Build
A tile-to-wood transition is an opportunity to create a smooth visual flow between different areas of space. Think about the overall flow of the space, how it functions, and the design elements.
You can create more of a natural transition by leaning into an organic and less structured design as shown above, seamlessly guiding the eyes from one area to the other. When thinking through your tile-to-hardwood transition, aim for complementary colors and textures, and avoid contrasting patterns to enhance the integrity of the design.
Tile to Cement

Large Hexagons & Custom Planters - Custom Color Rainforest
Tile transition to cement creates a more sleek and industrial aesthetic overall because of the missing warmth that hardwood naturally provides. Since both materials are smooth and stark, you can play around with the color and texture of the tile to add visual interest to the space.
This is where handmade tile shines and those natural variations pop against the cement. Tile and cement are both extremely low maintenance, easy to clean, and very durable, making them the perfect material for floors, counters, and other heavily used parts of the home.
Classic Straight Line

Photography - Chelsie Lopez Production
Tile installation - Kinetic Design Build
Use the Mercury Mosaics tile calculator to make sure you have enough tile for your project before getting your hands dirty.
The straight-line transition is a classic and simple way to separate two living areas. This tile floor transition is suitable for nearly all design styles and is the default method for most installations, especially with a tile-to-carpet transition. Although this method works best with simple designs and large tiles, any size or shape will work.
To achieve perfectly straight transitions, prepare your surface so it’s clean and level, and lay the tile out in the space before applying any adhesive. Make precise cuts in the tile to ensure clean lines and use tile spacers to keep your grout lines clean and uniform.
Diagonal Dynamics
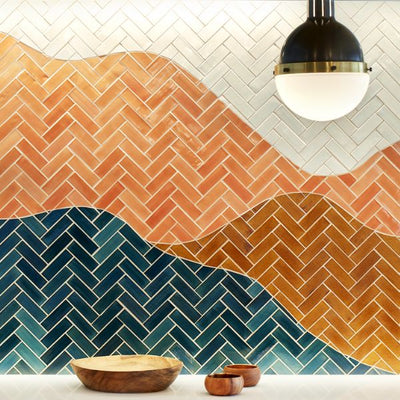
To add more energy and a visually striking effect to your space, try a diagonal line transition. This option is less common but great for larger spaces where you want to make a bold statement. Diagonal transitions work particularly well with herringbone tile patterns or other patterns where there are natural diagonal lines you can leverage. To successfully execute this option, make sure to plan the tile arrangement before making any cuts, and take precise measurements so the angles and lines turn out cleanly.
Smooth Curves
Tile flooring transitions don’t have to be linear. To achieve a softer, more elegant feel in your space, opt for a smooth curve transition. When done correctly, rounded curves gently guide the eyes from one area of the space to the next, creating a better sense of continuity.
Curved transitions work well in entryways, open-concept kitchen and living areas, and even outdoor spaces. Think about how you can complement or soften existing parts of the room like harsh countertops or kitchen islands to enhance the flow and cohesiveness of the space.
Custom Pattern

Custom Cut Subway Tile - Custom Colors: Deco White, Grey, Steel, Satin Black, Costa Rica, Patina
Photography and Design - timberandtulip
For a truly bespoke look and visual focal point in your space, create a custom tile inlay. Custom inlays not only elevate your home’s luxury but also allow you to showcase your unique style.
The possibilities are endless when you collaborate with Mercury Mosaics tile specialists on an original custom tile design. Custom inlay tile designs can be as intricate or minimal as you’d like. As shown above, tile resembling the richness of an area rug in a one-of-a-kind design may lead to your guests having to do a double take.
Organic Tile Edge Pattern

2"x6" Subway Tile - White
Medium Diamonds - White, Silver Lining
Medium Diamonds Custom Colors - Grey, Light Grey, Steel, Cloudy Sky, Satin Black, Black
Photography - Chelsie Lopez Productions
Design - Construction2Style
If you are using less standard tile shapes like diamonds, hexagons, or irregular stone tiles, accentuate that natural shape by creating an organic tile edge pattern. Organic tile edges work for floor transitions or wall transitions as shown above. This less structured option is perfect for more rustic and unsophisticated design styles, creating a fluid and visually soothing look. Mimicking the fluidness found in nature like running water, it adds a softness and sense of harmony to the space.
Tile-to-Tile Transition

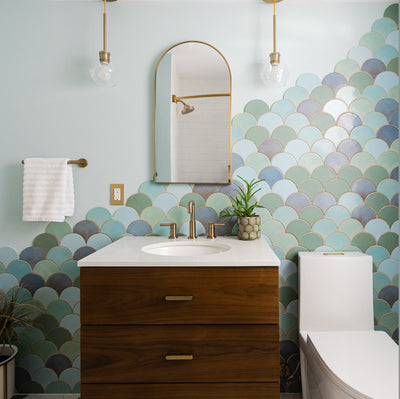
Large Moroccan Fish Scales - Blue Bell, Sea Mist, Lagoon, Bluegrass
Large Moroccan Fish Scales Custom Colors - Canton Jade, Mint Julep
Photography - Bluestone Lane
If you have any areas of your space where one tile type or design meets another, you’ll also want to think through how to handle those transitions. This is common in spaces like the shower where you have tiled walls that meet with the tile flooring.
Use complementary colors to maintain cohesion or opt for contrasting colors to create distinct separation. You can play with scale and pattern in addition to color to create effective transitions between spaces. If there’s no natural breakpoint, consider continuing the tile to the ceiling for maximum impact.

Top right: Victorian Pattern - Deco White, Custom Colors: Patina, Grey
Interior Design & Photography - Patti Wagner
Learn how artisan-crafted, handmade tiles like the ones from Mercury Mosaics can outshine and outlast machine alternatives.
Decorative Patterns

3"x8" Subway Tile - Sapphire Blue
Small Hexagon Flower Blend - Iris Blend.
Photography and Interior Design - Sophie Loghman
Your transition from tile to hardwood doesn’t have to blend in. To add some flair to your space, get creative with your tile patterns at the transition points.
The hearth of the fireplace is a great spot to incorporate a decorative tile pattern that complements any tile or brick surrounding the fireplace and also the rest of the flooring in the space. For open living spaces, instead of using metal tile transition strips, create a decorative strip of tile design to serve as the tile trim edging and complement the materials on both sides of the change.
Gradual Blends
Gradual blends in tile transitions can unify and create a seamless visual flow from one area to the next. Gradual transitions can utilize progressive differences in color, pattern, or shape of tile to create movement and flow.
Ombre blends make use of tiles in increasing shades to create a beautiful transition, usually sticking with the same size and shape of the tile. River-run mosaics arrange tiles in a way that mimics natural water patterns, while progressive pattern changes slowly shift from one tile pattern to another. These subtle transitions bring a sense of cohesion to multiple spaces and enhance the overall aesthetic of a home or commercial space.
Bold Contrasts

Photography - Nick Bayless Photography
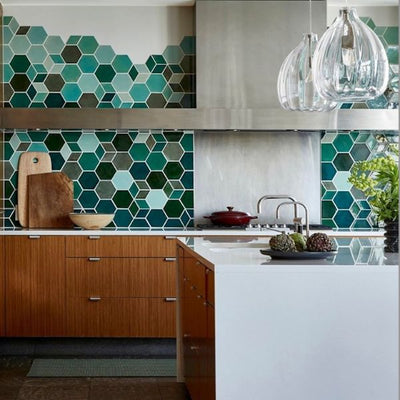
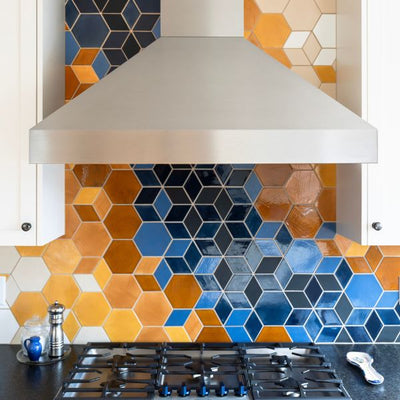
For a more dramatic visual effect, use bold contrasts of either color or pattern in your tile transition. Color contrast alone can create a nice statement and define the area from the rest of the space. To pull this option off successfully, balance the bold pattern or color choice with neutral elements to avoid overwhelming the space. Contrasting areas work well for a single focal point like the backsplash above the stove or the floor of a small space like an entryway or kitchen.
Metal or Schluter Trim

Small Hexagons - Custom Color: Light Grey
Photography - Chelsie Lopez Production
Tile installation - Kinetic Design Build
To create a perfectly clean line transition, utilize metal tile trim to separate the zones. Metal transition strips work particularly well when working with a transition from tile to wood floor transition or for a tile doorway transition.
In addition to creating a clean division, metal or Schluter trim pieces protect the tile from chipping and other damage from wear and tear. Consider the existing finishes in the space and overall design aesthetic when selecting the right finish and profile. Chrome or brushed nickel works great in more contemporary homes, while brass or bronze works nicely in more traditional homes.

2"x6" Herringbone - Patina
Photography and Interior Design - Bari J.
Picking out the perfect grout color for your tile project is the first step in ensuring your design stays sharp for years to come.
Geometric Patterns
Applying geometric patterns to your tile transitions can add modern sophistication and visual interest. Examples of geometric transitions include using hexagonal tiles in contrasting colors to create patterns within the transition, mid-century modern patterns using triangular tiles, or using smaller square tiles in contrasting colors to create a checkerboard pattern. These eye-catching patterns will create stunning focal points and enhance the overall design of the space.
T-Track Precision
T-Track is a type of tile trim edge that fits into the gap between tiles, providing protection to the edges and making sure the seam between the two materials is flush.
When installing T-Track systems, it’s important to ensure both areas of flooring are level and measure the cuts accurately for proper alignment and the sharpest lines. A T-Track edging strip for tiles creates a clean line and is perfect for more modern and contemporary spaces. This option is not only aesthetically pleasing but also durable and functional.
Blending Tiles and Floor Boards of Equal Size
To seamlessly blend equal-sized tiles and wood flooring, choose tile and wood tones, grout colors, textures, and finishes that are complementary. Pair warm red oak with glossy ceramic tile in warm tones, and unfinished white oak with more cooler tones in a matte finish. The flooring of similar size allows you to space them evenly and create a cohesive look across the different materials This coherence is visually pleasing and blends the two spaces seamlessly.

From floor to ceiling, find inspiration from Mercury Mosaics gallery of handmade tiles to brighten any space.
Aesthetic Considerations For Tile Transitions
When designing tile transitions, you’ll want to keep certain aesthetic considerations in mind. To start, consider the existing architectural elements and design style of the home or commercial space. Any tile upgrades including tile transitions should complement and enhance those existing features rather than clash with them. Lean into what’s there while bringing in your unique touch.
Depending on the space, you might want to add a bit of contrast in either color or shape to add visual appeal. Balance is key though, especially when you bring in a bold contrasting element. All the factors below contribute to the overall design narrative and should be considered before starting your project.
Borders vs. Borderless
Whether or not you use a border in your tile transition can impact the overall feeling of the space. For more formal spaces like dining rooms and entryways, and especially in modern design, borders can effectively frame off an area and provide visual separation. For rustic design and in more open-concept spaces, borderless tile transitions can provide more of a visual flow between areas and impart a feeling of openness.
Colors and Patterns
Use color and pattern to either create a seamless flow between areas or a bold statement and visual focus. There is no right answer and it will depend on your space and the feeling you want to create in it.
For that cohesive look, choose colors in the same tones and make sure the patterns have a common thread. For a more contrasting look, try a bold pattern or color surrounded by neutral elements to make it pop. Aside from color and pattern, you can also play with texture, tile variation, and scale to enhance the space.
Material Choice
The material choice for tile transitions will depend on aesthetics but also the performance and longevity needed.
In higher traffic areas that are prone to getting wet like kitchens or main bathrooms, you’ll want durable materials that are easy to clean and water resistant. Ceramic finishing tile pieces or metal will be your best bet.
For tile transitions to a bedroom that is less trafficked and where water isn’t an issue, you may opt for a natural wood transition. By taking some time to think through your material choice and align it with the demands of the space, the result will not only be beautiful but also functional.
Angles and Curves
With tile transitions, you can get creative with the layout to create more seamless movement or bold visual appeal within a room. Curved tile transitions create a sense of fluidity and mimic nature, while angular tile transitions create a more stark and bold statement. Some tile shapes, like diamonds and subway tile in a herringbone pattern, work naturally well as an angled transition. Curved tile transitions are a bit more complex to install and generally work better with larger tiles.
Tile Transition Location
When determining the location, always let the existing space guide and inform your choice. By working with and not against the space, you can maximize the impact and functionality.
Homes that have delineated zones between areas make transition placement easier. Doorways, cabinetry, and wall corners are all examples of a clear transition spot you can leverage. For larger and more open-concept spaces, deciding on a tile transition location can be a bit more of a challenge. In those cases, think about functionality, furniture layout, and how you plan to utilize the space to help guide the tile transition placement.
Managing Height Differences
Aside from the aesthetic appeal, one of the key reasons for flooring transitions is to minimize the tripping hazards that come with floor height differences between spaces. Varying types of floor materials and heights and the subfloor beneath can all contribute to those height differences.
Minor differences in height can be remedied with T-Track or other metal tile transitions, but significant height differences may require a tapered wood transition. These small details matter, so it’s best to address them now to ensure accessibility and safety for all who enter the space.
Mercury Mosaics: Where Elegance Meets Expertise in Tile Design
At Mercury Mosaics, our tilemaking process results in a truly exceptional piece of tile each and every time, so no two are identical. The beautiful variation in color and texture that you get with handmade tile is simply unmatched. With custom tile design options and expert advice from our team, your unique vision will come to life and elevate your space.
Not sure what you want for your space? Take our personal style quiz to get you started, or contact us today and we’ll do all the heavy lifting.


