The last thing you want when installing new tiles is messy edges. Whether you are a homeowner doing a DIY remodel or a designer looking to expand your skills and attract new clients, learning how to finish tile edges can transform any tile installation project.
No matter what tiles you choose, the right edge treatment can enhance the appearance of the tile, protect it from damage, and help it to last longer. Many different types of tile trim edges are available, so you will want to understand how each one will affect the overall design and how to install them properly.
- How to Finish Tile
- How to Choose Tile Trim
- Installation Tools and Materials
- How to Install Tile Trim

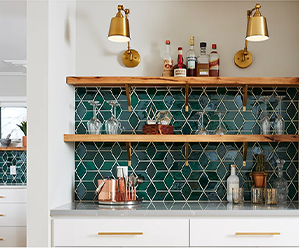
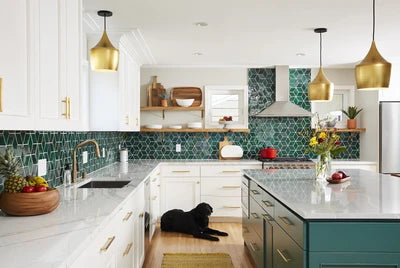
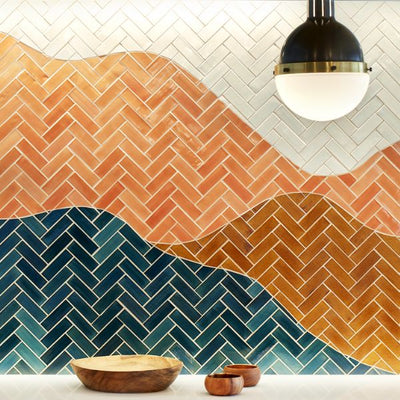
2”x4” and 3”x8” Subway Tile, Pencil Liners
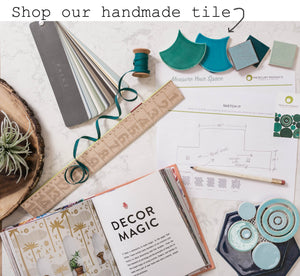
Discover Mercury Mosaics tile trim pieces for an elegant finish to your tile project.
How to Finish Tile Edges
Finishing tile edges is something that anyone with the right materials and research can do. The exact materials needed and the specific steps to follow vary between the tile edge options.
Bullnose tiles feature a trim on one edge and you can install them like regular tiles. Other tile edging options, such as a pencil liner or V Cap, require an extra piece added to the regular tiles. You can apply a waterproof sealant as a trim for tiles that already have a finished look around the edges.

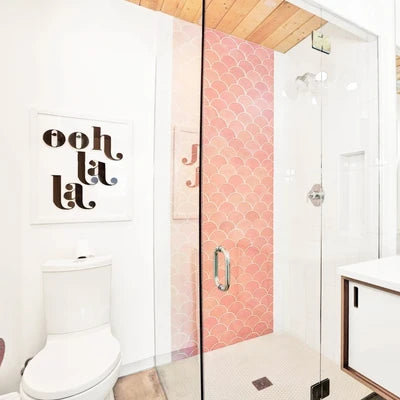
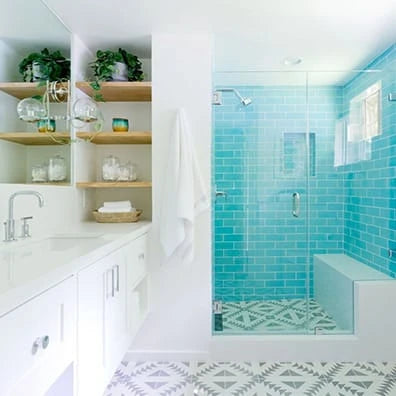
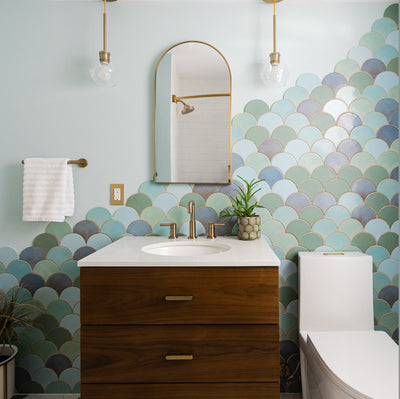
Large Moroccan Fish Scales - Sea Mist
Small Moroccan Fish Scales - Sea Mist, Coastal Breeze
V Cap Finishing Pieces - Sea Mist
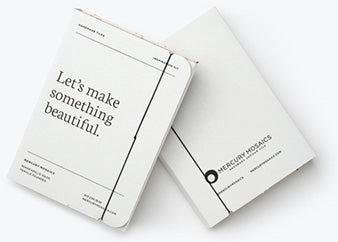
Explore Mercury Mosaics sample packs to experience the look, and feel the difference of handmade artisan tiles for your mid-century modern designed home.
Bullnose Trim Tile

Bullnose tile edging trim is one of the most common and versatile options for tile trims. Bullnose tiles look similar to regular tiles but they have one curved edge to serve as a built-in trim.
Contractors use bullnose tiles to create a smooth, rounded finish on exposed edges. They come in many different shapes and sizes so they can be used in tight corners. Bullnose trim works great with shower tiles, countertops, and tiled backsplashes.
Pencil Tile Trim

If you are looking for alternatives to bullnose tile edges, pencil tile trims are a narrower, decorative option that creates a sleek transition between tiles and other surfaces. They come in various materials, sizes, and shapes.
Sometimes called pencil liners, they are often used to accent backsplashes or as a tile-to-tile transition strip. They provide depth which can add a striking element to your home or your client’s home. Avoid using pencil trim for tiled floor transitions because it can create a tripping hazard.
V-Cap Tile Trim

V-Cap tile trim covers the exposed, outer edges and corners of tile installations, particularly on countertops and ledges. They are crafted with a curved edge at different angles to fit edges and corners. They can add a decorative finishing touch to any tile you choose.
V-Cap trims are also practical. Like pencil liners, they create raised edges. You can use them around sinks to prevent water from spilling out, but avoid using them on floors near walkways. Because of their beneficial use around sinks, V-Cap tiles are sometimes called sink caps.
Chair Rail Trim

Chair rail trim is used as a decorative and functional option to create a border or to cap tile wainscoting. It offers a classic, elegant finish for dining rooms, bathrooms, and kitchens. Install a chair rail approximately 30-40 inches above the floor, as that height matches the average height of a chair.
The signature feature of chair rail edges is that they are larger at the top and narrower at the bottom. However, there is a good amount of variation in the design of chair rails, so get creative and have fun exploring your tile trim ideas – chair rail trim options range from simple to dramatic.
Cove Base Trim

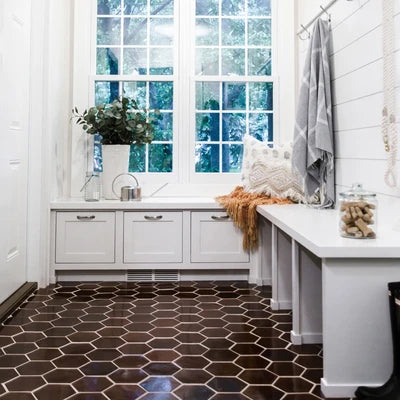
Custom Cove Base Edging - Navy
Cove base trim is a tile option designed to transition seamlessly between floors and walls, especially in high-traffic areas. It protects walls and corners, making it ideal for use in commercial spaces or bathrooms that require water resistance. The design of these tile transition strips is flat with a slight flare at the bottom. They come in various heights, colors, and materials, but the design remains fairly consistent.
Metal or Plastic Schluter Trim
Schluter trim is a modern option, available in both metal and plastic, that provides sleek edges for tile installations. It is an excellent addition to any contemporary space and works great as a tile-to-tile trim.
For a polished look, a high-quality metal tile edge trim does the job. Metal edge trim is easier to clean and sanitize, making it ideal for high-traffic areas. Use metal Schluter strips as a ceramic tile edge trim for a distinctive finish.
Wood Trim
Wood trim is a more rustic choice for tile edging, perfect for adding warmth and character to traditional designs. It works best in dry areas like living rooms and bedrooms, as water exposure can cause the wood edges to warp or rot. Wooden edging strips for tiles can have many different designs to match your desired aesthetic. For example, for a Victorian-era style, you could use a wooden ceramic tile edging trim.
Caulked Edges
A caulk tile edge creates a watertight seal while blending seamlessly with the surrounding grout and tiles. For this reason, you should use it in areas that regularly experience moisture, such as bathrooms and kitchens.
Using caulk to finish tile edges can also save time and money compared to some of the other options described above. It can create a clean, finished appearance when used on tiles that already have sleek edges such as tumbled stone, glass, and glazed ceramic tiles. Look at the tiles from the side to determine if they look raw or finished enough for organic edging.

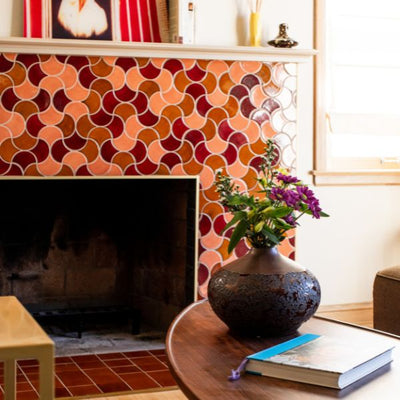
Pencil Liners and Medium Moroccan Fish Scales - Satin Black
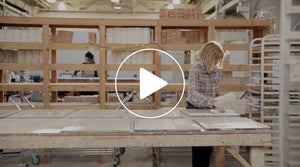
Learn how artisan-crafted, handmade tiles like the ones from Mercury Mosaics can outshine and outlast machine alternatives.
How to Choose the Best Edge Finish for Your Tiles
When choosing the best tile edge finish for your project, consider tile material, room environment, and design preferences.
- Availability: You can only work with the materials available. Explore local design stores in your city and state. They will have samples of different tile time edges for you to look at.
- Durability: Think about the space the tile trim edges will be in. If it’s a highly used area, a more durable material would be ideal. Finish places that may be exposed to water, like around sinks and showers, with non-porous materials.
- Aesthetics: Consider the overall style that you want the space to have and choose a tile trim that complements it. Think about how visible you want the tile trim to be. Do you want it to pop or do you want it to blend in with the tiles?
Tile Trim Materials and Tools
The right tools make installation easier and ensure a professional finish. While some of the materials required will change based on the specific project and the type of finish edge tile technique you chose, below is a general list of what is needed:
- Tile trim pieces
- Tile cutters
- Tape measure and pencil
- Thin-set mortar
- Trowel
- Grout and grout spreading tool
- Caulk
- Safety goggles and gloves

From floor to ceiling, find inspiration from Mercury Mosaics gallery of handmade tiles to brighten any space.
Step-by-Step Guide for Tile Edge Finishing
Elevate your tile project with this practical, detailed guide for installing the various types of tile trim. Follow the instructions below carefully to achieve a polished, professional look. No previous experience is needed so whether you are a designer or a homeowner, you can complete your tile installation project with the perfect finishing tile edges.
Installing Bullnose, Pencil, and V-Cap Trim
Bullnose trims, pencil liners, and V-Cap trims are all types of edge tiles with similar installation instructions. Proper cutting, positioning, and grout application are essential for a seamless, polished tile installation project.
- Step 1: Ensure the tile trim piece you want to install is the right size. Measure and cut it to size if needed.
- Step 2: Apply thin-set mortar to the back of the tile piece and to the wall where the piece will go using a trowel.
- Step 3: Position the tile piece in its desired spot on the wall or floor and press it securely into place.
- Step 4: Wipe the tile trim piece with a damp sponge or cloth to remove excess mortar.
- Step 5: Install grout in between the tile trim and the surrounding tiles. Wipe the tile trim piece again to remove excess grout.
Installing Chair Rail Trim
You can cut chair rail trim pieces to fit your space with a wet tile saw or manual tile cutter. Align the chair rail with the top row of tiles or wainscoting for a polished finish.
- Step 1: Use a level, measuring tape, and pencil to mark where you want the trim to line up with your floor, wainscoting, or other design element.
- Step 2: Cut the chair rail trim pieces to size. For corners, you will need to cut the pieces at opposite 45-degree angles.
- Step 3: Nail the chair rail trim to the wall with two nails near the top and bottom of the railing about every 1 foot.
Installing Cove Base Trim
Cove base trim should be installed flush with the ground. The trim may not adhere fully if there is moisture, so dry the area completely first.
- Step 1: Measure and cut cove base trim pieces to size using a utility knife.
- Step 2: Spread a specific cove base adhesive to the back of each trim piece.
- Step 3: Press firmly or use a roller to apply the trim to the wall.
Installing Metal or Plastic Schluter Trim
Unlike other types of tile trims, Schluter plastic and metal edging strips for tiles must be installed before the last row or column of tiles. You can buy them in long pieces that you must measure and cut to your desired length. Make sure to review the steps below in full before beginning your project.
- Step 1: Measure how long each piece of trim should be and cut to size.
- Step 2: Apply tile adhesive to the wall where the last row of tiles will go.
- Step 3: Press Schluter trim pieces into the adhesive where the edge of the last tile should be. The holes in the base of the trim should be in the adhesive.
- Step 4: Finish installing the remaining tiles.

Large Moroccan Fish Scales - Sea Mist
Explore more ideas for finishing tiles such as edge glaze, flat liners, and quarter rounds.
Installing Wood Trim
Wood trim can be tricky to install because it requires an adhesive that works on both wood and ceramic surfaces such as silicone. Also, because wood and tile expand at different rates, you will need to add a layer of caulking between them to protect the trim over time. Think about matching it to the color of the grout used for the tiles.
- Step 1: Measure and cut wooden trim pieces to size using a large-tooth saw.
- Step 2: Apply silicone adhesive to the back of each piece.
- Step 3: Position each piece to be a few millimeters away from the tile edge to allow the wood to expand.
- Step 4: Press each piece securely into place.
- Step 5: Apply caulking between the trim edges and the last row of tiles.
Caulking Edges
Caulking edges is done after all tiles have been installed. You only need some caulk and a caulking gun.
For a smooth, watertight seal, ensure that the application area is completely dry before finishing the tile edges. Caulk comes in different colors. Look for one that matches the grout color.
- Step 1: Cut the caulking tube open at a diagonal angle based on the thickness of the edge you want.
- Step 2: Insert the caulking tube into the caulking gun.
- Step 3: Apply a constant line of caulking along the edge of the tile.
- Step 4: Use a dry cloth or a finger to remove any excess caulking.
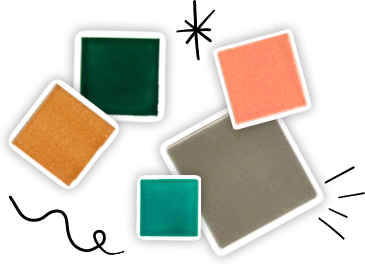
Find The Right Tile Edge For Your Project From Mercury Mosaics
When it comes to tile installation, the details matter, right down to the tile trim ends. To get tile edge trim ideas for your next project or client, explore all the handmade tile options from Mercury Mosaics. All our tiles are handcrafted, from classic subway tiles to funky geometric shapes. When you order one of our ready-to-ship sample packs, you can see and feel the difference that artisan craftsmanship makes.