In the world of home improvement projects, one of the more intimidating projects is tile removal. Projects that involve tile removal can be time-consuming, frustrating, and physically taxing. With a few helpful tips and tricks from the tile makers themselves, you’ll be better equipped to take on your tile removal project.
Choosing to remove your tiles can be a great way to save for your dream tiles as you plan to update your space and get ready for tile installation. It may also be necessary for a quick fix if you need to replace broken tiles. Before you commit to replacing the tile on your own, research the process and consider the size of your job. With a little bit of research and some handy tips and tricks, you’ll go into your tile removal project prepared for anything.
- Different Types of Tiles
- Mortar vs. Mastic
- Tools
- Before You Start
- Remove Tiles in 6 Steps
- Tips
- Extra Considerations
- Next Steps
- FAQ

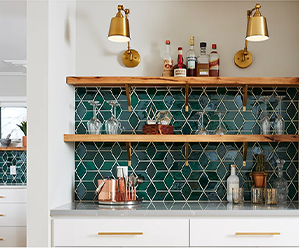
Mid Mod Squares - South Beach Blend
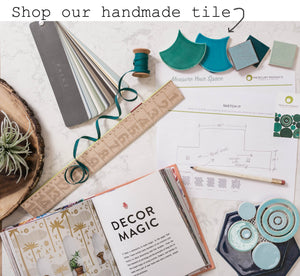
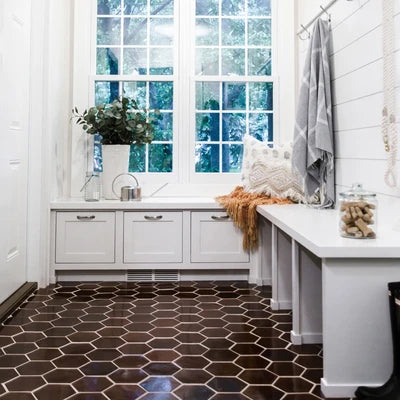
From floor to ceiling, find inspiration from Mercury Mosaics gallery of handmade tiles to brighten any space.
Different Types of Tiles
Before diving head first into removing tile flooring, be sure you know what type of tile you are working on within your space. Ceramic tile removal will look different than stone tile removal due to varying thickness and durability.
If you're still planning and exploring, consider artisan tile to get the natural variety and beauty of stone with customizable design options for your space. The process of making tiles by hand ensures a premium product where no two tiles are exactly alike, making your space almost as unique as you are.
- Ceramic: One of the most readily available types of tile, ceramic tiles are made by pressing clay into shapes, drying, and firing them in a kiln, and can be either glazed or unglazed. Ceramic tiles are lightweight, easy to install, and have endless design possibilities to fit your unique style.
- Porcelain: Also made from clay and other natural materials, but kiln-fired at a much higher temperature, porcelain tiles are very durable and require little maintenance. Porcelain tiles, despite their thinness, are almost entirely non-porous, making them a good option for high-traffic areas and even outdoor use.
- Cement: You might picture cement outdoors on walkways, but indoor cement tiles are becoming increasingly popular. Cement tiles are very durable and their porousness allows them to age nicely over time. But they are generally less affordable, more difficult to install due to their thickness, and involve more maintenance than other options so be mindful if you opt for cement tiles.
- Stone: Natural stone tiles like slate, travertine, and marble give you a beautifully natural stone with all of the variety that comes with it. However, they are usually more likely to scratch and stain. Natural stone tile is best used as an accent or in less trafficked areas.
Mortar vs. Mastic Tile Adhesive
The two most common adhesives used to lay tile are mortar and mastic. Mastic is more of a glue-like substance that will come apart in large pieces. Mortar is often more difficult to remove and is messier because the pieces chip off in smaller sections. Identify which type of adhesive you have underneath your tile because it will inform the removal process, which we’ll get to next.

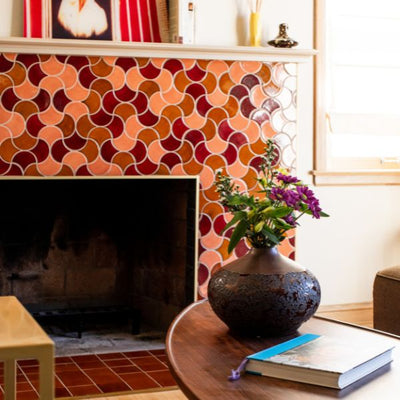
Large Hexagons - Custom Color
Interior Design - Kinetic Design Build
Photography - Chelsie Lopez Production
Use the Mercury Mosaics tile calculator to make sure you have enough tile for your project before getting your hands dirty.
Tools and Materials Needed
Many of the tools and materials you need to remove tile floor are household staples, like a hammer, broom, and floor scraper. Other tools to remove tile floor include safety protection like work gloves, safety glasses, and a mask to keep you from inhaling the dust and debris. If your project involves extra adhesive or stubborn areas, you may need to consider upgrading to a power tool to help you get the job done.
- Painters Tape
- Plastic Sheeting
- Contractor Trash Bags
- Hammer and Small Sledgehammer
- Masonry Chisel
- Floor Scraper
- Sponge
- Bucket or Wheelbarrow
- Broom
- Shop Vac
For Safety and Comfort
- Protective Glasses or safety goggles
- Dust Mask
- Work Gloves
- Closed Toe Shoes
- Knee Pads
- Long Sleeve Shirt and Pants
- Ear Protection
Before You Start
To avoid turning your home into a total vortex of dust, take the time to prep your workspace and seal it off from the rest of your home. Remove any unnecessary items from the space and have a dedicated spot for your contractor garbage bags ready to fill.
By keeping the space clean throughout the job, you’ll minimize the risk of injury and get the project done more efficiently.
- Close Vents and Open Windows: Close any vents in the room and seal them off with plastic to minimize airflow to other areas of your home. Open any windows to bring some fresh air into the space and help with ventilation.
- Seal Entryways with Plastic Sheeting: place plastic sheeting over the doorway to the room and keep it sealed while you are working.
- Remove appliances: Large items like the toilet and vanity should be removed before getting started to keep the space as clear as possible.

Still deciding what to do once you remove your tiles? Take our personal style quiz to find out.
How to Remove Tiles in 6 Steps
You can break down the process of removing a tile floor into six steps. Like any home project, a little research and preparation can go a long way. Make sure you’ve considered your experience level and the scope of the project at hand, especially if you are in a time crunch.
1. Gather Your Supplies
Think of this step as your proper set up for removing floor tile. Having all of your tools and materials gathered and ready to go before you start will help you avoid delays and ensure a more efficient process. Gather all of your safety gear and tile removal tools, and don’t forget about the trash bin.
2. Remove Grout
The easiest way to remove tile is to start by removing the grout. Once you’ve donned your safety gear, place your masonry chisel on the grout line at an angle and use your hammer to chip away at the grout. If you’re dealing with an extra large space or stubborn grout, you can try using a grout saw or other power tools to get the job done. Just be sure you are familiar with how to use the power tools safely, and don't forget your safety goggles!
3. Remove Tile
Once you have the grout removed, you can use that open space to get your mason chisel in between the tiles and pry up the tile from the mortar underneath. You may have to use your hammer and if that isn’t doing the trick, try scoring the tile diagonally or placing the chisel in the center of the tile and striking it with the hammer to break it up.
Just be careful and don’t go too crazy with this step. You’ll want to keep your subfloor intact to avoid extra work after taking out the tile.
4. Remove Remaining Grout or Adhesive
Now that you have finished removing all old floor tile, you will likely have some remnants of grout and the adhesive that was underneath the tile. Continue chipping away at the mortar with your hammer and chisel. If you have mastic adhesive, you can use a damp towel to soak the mastic until it softens. Sweep up all scraps of tile and adhesive so you can get a good look at the subfloor underneath.
5. Inspect and Prepare the Subfloor
After removing the tile and grout, take a moment to inspect your subfloor for any damage. This includes any water damage, sunken spots, or missing subfloor. To get the best results from your new tile floor, you’ll need to start with a level subfloor. Cut out any damaged or uneven portions and replace them with a new subfloor.
6. Cleanup
You’ve made it through the toughest parts of the job; now for cleanup. Sweep the pieces of tile and adhesive into your contractor's trash bags and use your shop vac to vacuum up any remaining debris. Consider recycling or reusing any tile pieces that remain intact, especially if they are hand-crafted tiles. You can use even smaller pieces of leftover tile to create beautiful mosaic art.

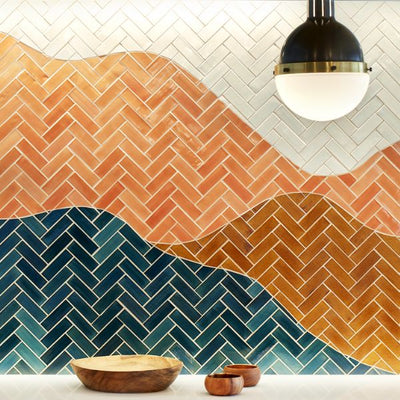
Large Triangles - Custom Colors
Interior Designer and Installation - Construction2Style
Photographer - Chelsie Lopez Production
Explore Mercury Mosaics sample packs to experience the look, and feel the difference of handmade artisan tiles in home.
Tile Removal Tips
While there’s no perfect or best way to remove tile, we have some tips from experience for how to remove ceramic tile efficiently. Preparation is key in any house project, and that includes taking the necessary safety precautions. With a few handy tips up your sleeve, your tile removal project may not be as bad as you think.
- Handling Difficult Tiles: if a section of tile is extra difficult to remove, you may have to try scoring the tile or striking it in the center. When all else fails, upgrade to a power tool like a demo hammer.
- Removing Sticky Residue: If you come across sticky residue, try soaking it in a warm towel with water and vinegar to loosen it up.
- Prep Your Workspace: Line up all the tools you’ll need beforehand to make it easier on yourself when removing tile, and don’t forget the trash bin.
- Invest in Kneepads: If you are removing floor tile, you’ll be spending a lot of time kneeling and will want some padding. You can thank us later.
- Take Safety Precautions: To avoid shards of tile and grout flying into your eyes or skin, wear long clothing and safety glasses (ski goggles work well, too!).
- Rent Your Tools: If you don’t have all the required tools to remove floor tile, check out your local hardware store for affordable renting options.
- Start With the Weak Spots: It’s often easier to start removing ceramic tile at the corners or entry thresholds since those are the weakest spots.
Tile Location Considerations
In addition to tile and adhesive type, the location of the tile you are removing will inform the best approach. When you remove tile flooring, there are a different set of considerations than when you remove tile from a backsplash or ceiling. Each location will have sensitive areas and considerations based on what’s behind it.
No matter where you're removing tile from, consider saving undamaged tile pieces for another area of your home or repurpose them into beautiful tile art.
Backsplash Tile Removal
Removing backsplash tile or wall tile can be easier than removing floor tile because it’s usually softer. The downside is that you still have to use some force to pry those tiles up, which almost always ends up in damage to the drywall behind it. You may also end up with tiny or hard-to-reach places that make the removal process more difficult.
Floor Tile Removal
The best way to remove floor tile is to start at the weakest point. For floor tile, that often means at the entry threshold, corners, or edges around any fixtures. Be careful when chipping away at the tile adhesive - most subfloor materials are particle board or plywood, which you can easily damage. For larger projects, you may want to break it up over the course of a few days.
Ceiling Tile Removal
Your arms will tire very quickly if you’re working on a ceiling tile removal project. Use a ladder to get close to the ceiling, or better yet, rent some scaffolding so you can get even closer to the ceiling and lay down while you work. This means you won’t have to extend your arms as high up above your head. Be especially careful as it's easy to get tired or dizzy from staring at the ceiling for extended periods.

Redpath Constable Interior Design
Karen Melvin Photography
Learn how artisan-crafted, handmade tiles like the ones from Mercury Mosaics can outshine and outlast machine alternatives.
Next Steps After Removal
Once you finish removing the tile, you have a blank slate to work with! You're ready to install the new tile of your dreams and take your space to the next level. Personalize the space with durable, handmade artisan tiles, such as our unique vertical subway tile with a twist, to make it truly your own. Each tile contains natural variation just like the artisan who made it. Put your creativity to work by using any tile scraps to make a piece of wall art, or explore mosaic kits at our sister site, Mosaic Candy Shop for even more inspiration.
Mercury Mosaics: Handmade Tiles Make Dreams A Reality
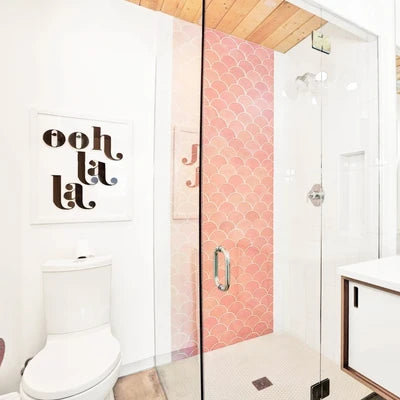
Once you have your tile removed, your possibilities are endless! You have a blank space to make it truly your own. Whether you’ve been looking to jazz up your space with a herringbone pattern or emulate the flow of water with Moroccan Fish Scales, handmade, artisan tile is a timeless piece of art that will elevate any space.
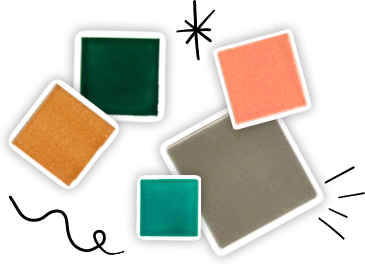
At Mercury Mosaics, we believe handmade tile creates a beautifully bespoke product that commercial production simply can’t replicate. Crafted lovingly by a team of artisans, each piece of tile touches nine pairs of human hands before it ships out our door.
From hand cutting to applying the glaze by hand, no two pieces of tile will turn out the same. We meet you where you are with options ranging from fully custom to our selection of made-to-ship tiles. Elevate your space and find inspiration for the perfect hue and pattern from Mercury Mosaics.
Contact us today for a free quote on hand-crafted tiles for your next project.
How to Remove Tile FAQ
How long does tile removal take?
Depending on the size of your space, tile removal can take anywhere from one day to several.
Backsplash tile removal in particular usually is more extensive because it involves at least some degree of drywall repair. Replacing a tile floor can bring about some surprises about what’s underneath, especially if the tiles are old.
If you choose to tackle the project yourself, you should be prepared for any surprises and allocate an extra day or two in case something goes wrong.
Can I DIY tile removal or should I hire a professional?
If your space is very large or involves intricate and difficult-to-reach spaces, you may want to hire the pros. It’s also a good idea to hire a professional if you need to get it done in a short amount of time. DIY projects inevitably take longer than you anticipate. Removing a tile floor is physically exhausting, so be sure to build in breaks if you are tackling the project solo.
Can I save and reuse old tiles?
We encourage you to save as many of the old tiles as possible, especially if they have a unique pattern or color. You might have to take some extra steps to remove any remaining adhesive on the backside of the tiles if you plan on using them again. Even if you don’t have enough to use them in another space, they make great art projects like a mosaic table top or piece of wall art.
How do I dispose of tiles?
Before tossing the tiles in the trash, try posting any fully intact tiles on your local neighborhood group or donating them to a nonprofit organization that accepts building materials.
For any tile pieces that are too small to salvage or other debris, check your local regulations. They may require you to haul construction waste to a dedicated facility instead of placing it in your trash bin for pickup.
How much does it cost to remove tiles?
If your space is small enough to try tackling on your own, your costs will be pretty minimal with just materials to cover. If your space is too large and doing it on your own overwhelms you, hire the professionals to get it right the first time.
Costs can vary greatly depending on where you live, but you’ll usually get a price per-square-foot estimate, which includes labor, tools, and any disposal fees.