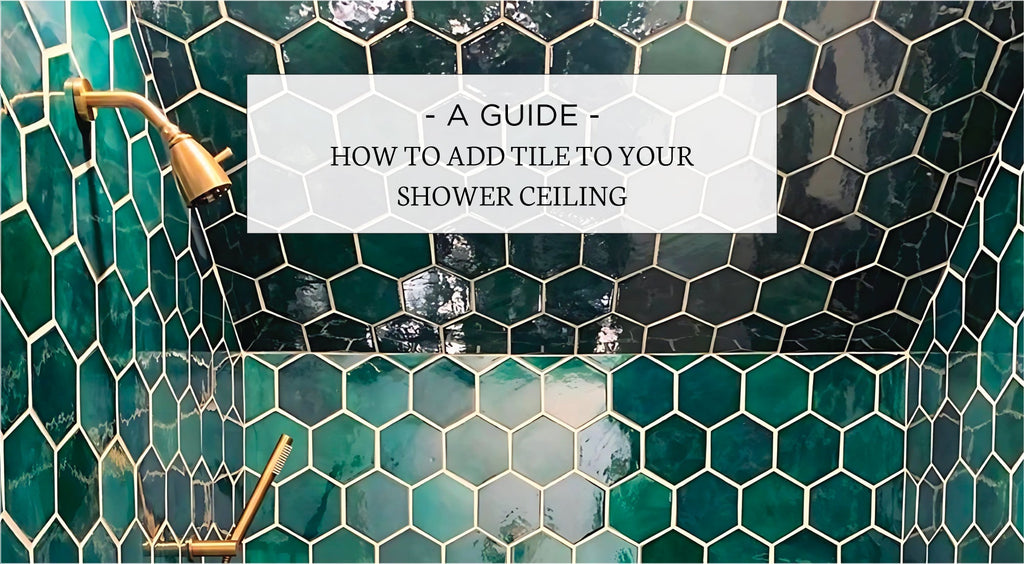
Tiling the ceiling of a shower is a stylish and practical upgrade that protects against moisture while giving your bathroom a polished, high-end look. Whether you’re updating your space or starting a new tile shower stall, understanding the process ensures a seamless and long-lasting installation.
The key to success is taking your time with each step—from marking the layout to applying adhesive and securing the tiles. Because moisture is a constant factor in bathrooms, waterproofing and proper mortar application play a crucial role in ensuring the longevity of your tiled ceiling. This guide walks you through choosing the right tiles, materials, preparing your ceiling, and installing tile overhead to help you create a stunning and durable ceiling that enhances your shower.
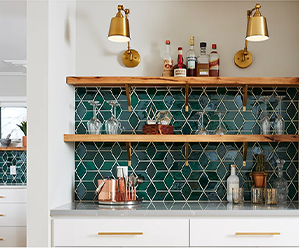
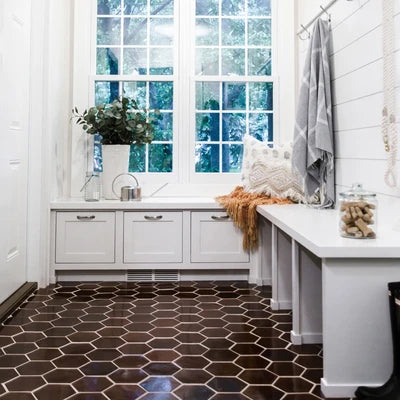
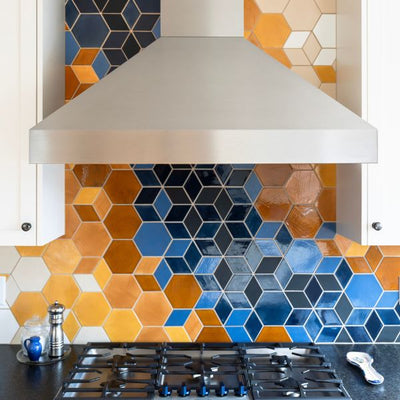
 Subway Tile – Blue Bell
Photography by Marissa Cramer
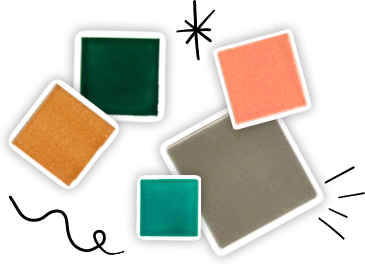
See and feel the quality of handcrafted tile by ordering a Mercury Mosaics sample pack for your bathroom.
Why Add Tile to Your Shower Ceiling?
While tile on a shower ceiling may seem like an optional upgrade, it serves an important purpose beyond aesthetics. A tiled ceiling acts as a water-resistant barrier, keeping your shower pristine and easier to maintain. While every bathroom benefits from proper waterproofing, some showers need ceiling tile more than others. Here’s when it’s a great choice:
- Walk-In or Steam Showers: Because steam rises, a tiled ceiling helps seal the space and prevent moisture from soaking into drywall. This is especially important for fully enclosed steam showers. Walk-in showers with high walls often expose ceilings to water directly as well, making waterproofing from tiles especially beneficial.
- Poor Bathroom Ventilation: If your bathroom doesn’t have an exhaust fan, moisture can cling to the ceiling, causing mildew and peeling paint. Tiling a shower ceiling offers an easy-to-clean, mold-resistant solution.
- Cohesive, High-End Look: Beyond function, extending your tile shower to the ceiling creates a seamless and luxurious feel of high ceilings. This is particularly effective when using handmade ceramic tiles from Mercury Mosaics, which add warmth and personality to the space.
Is Your Shower Ceiling Strong Enough for Tile?
Before jumping into installing a tile ceiling, it’s crucial to determine whether your ceiling can support tile. Unlike tiling a shower wall or floor, a shower tile ceiling is subject to gravity. Preparing the space and using a strong adhesive can make the difference between a gorgeous tiled shower, and a messy hazard.
Here’s what to check before getting started:
- Ceiling Material: Standard drywall is not strong enough to support tiles on the ceiling. Drywall absorbs moisture and weakens over time, making it an unsuitable base for heavy materials. Instead, use cement backer board, which is water-resistant and structurally sound.
- Ceiling Joist Strength: Ceiling joists are the horizontal beams that go across your ceiling to support weight. If your ceiling joists space more than 16 inches apart, you may need additional reinforcement. Weak ceilings can lead to tile sagging or detachment over time.
- Tile Weight: Heavier tiles like a natural stone or large-format tiles require stronger backing and additional adhesive support. If your ceiling can’t handle the extra weight, consider lighter ceramic or porcelain tiles which provide durability without excessive weight.
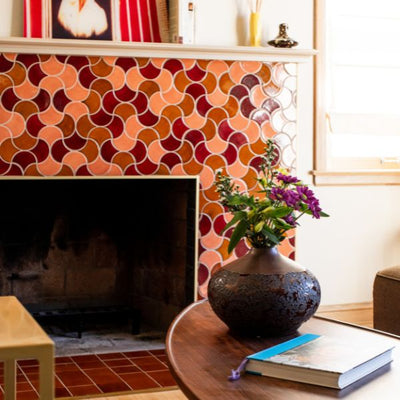
 Find beautiful bathroom tile designs that blend craftsmanship and creativity for a timeless look.
Choosing the Right Ceiling Tile Materials
Selecting the right materials for tiling the ceiling of a shower is the first step to ensuring a long-lasting, moisture-resistant installation. Unlike bathroom floor or wall tiles, ceiling tiles must be lightweight enough to stay in place, yet durable enough to withstand humidity, steam, and occasional direct water exposure. Some tiles need stronger bonding materials, while others require extra waterproofing to withstand constant moisture.
Here’s a breakdown of the best tile types for installing tile ceiling surfaces, and tools you’ll need to get the job done right.
-
- Ceramic or Porcelain: The best choice for ceilings because they are lightweight, water-resistant, and low maintenance. Mesh-mounted ceramic tiles from Mercury Mosaics make installation even easier.
- Natural Stone: An elegant but heavy option that requires extra support, epoxy grout, and sealing to prevent moisture absorption.
- Epoxy Grout: Waterproof and stain-resistant, making it the best choice for high-humidity areas like shower ceilings.
-
Essential Tools:
- Tile spacers
- Notched trowel
- Snap cutter & wet saw
- Laser level
- Grout float
Planning Your Layout and Dry-Fitting Tiles
Planning the tile shower ceiling layout before applying adhesive ensures straight alignment and proper spacing. Before starting, find the center of the ceiling and mark guidelines to ensure even tile distribution. Beginning in the center and working outward prevents awkward tile cuts along the edges.
Laying the tiles out on the floor first in the planned pattern helps visualize spacing and adjust placement if necessary. Using a laser level or chalk line ensures that tiles remain straight, reducing the risk of uneven gaps or misalignment. When you take the time to dry-fit tiles, you can make adjustments before applying adhesive, which ensures a flawless final result.

Bring your custom bathroom to life—work with Mercury Mosaics' expert tile designers to create something unique.
How to Prepare the Shower Ceiling
Preparation is critical for adhesion and durability when tiling a ceiling in a bathroom.
- Clean the Ceiling: Any existing dirt, dust, or peeling paint will interfere with the adhesive and weaken the bond between the ceiling and tile. If there is old adhesive or flaking paint, remove it with a scraper and sand the area until it’s smooth.
- Install Cement Backer Board: If your ceiling is drywall, you will need to replace it with cement backer board. Unlike drywall, cement backer board is moisture-resistant and provides a solid foundation for tiling. Secure the board using corrosion-resistant screws, and be sure there are no gaps between the panels where moisture could seep in.
- Apply Waterproofing: This seals the ceiling and prevents moisture buildup behind tiles, and is especially important in steam showers or bathrooms with poor ventilation, where mold can grow more easily
- Prime the Surface: After applying the waterproofing layer, prime the surface using a bonding primer to improve the grip of the mortar.
Step-by-Step Guide to Tiling the Ceiling of a Shower
Tiling a shower ceiling requires patience, attention to detail, and the right techniques to ensure a secure, long-lasting installation. Unlike wall or floor tiling, gravity is working against you, making proper adhesion and support essential. Without the right approach, tiles may slip, sag, or fail to stay in place.
The key to success is taking your time with each step—from marking the layout to applying adhesive and securing the tiles. With moisture being a constant factor in bathrooms, waterproofing and proper mortar application are pivotal to the longevity of your tiled ceiling. Whether you’re using ceramic, porcelain, or natural stone, following these detailed instructions will help you create a stunning and durable ceiling that enhances your shower.
Step 1: Mark the Layout
Before applying any adhesive, establish a precise tile layout to prevent uneven edges and excessive tile cuts. Measure the shower ceiling and find the center point by dividing the width and length in half. Use a chalk line or laser level to draw grid lines outward, helping you maintain straight and even tile placement. This is your starting point to creating a symmetrical and balanced layout.
Additionally, consider the pattern of your tiles. If you’re using large-format tiles, aligning them symmetrically with the shower walls will create a cohesive, polished look. If using mosaic tiles, make sure the edges align smoothly with the ceiling's perimeter to avoid cutting excess material.
Step 2: Apply Adhesive
After you’ve decided on the best adhesive for your tile type, it’s time to get your hands dirty.
Spread a thin layer of modified thin-set mortar in small sections, no larger than 2 square feet at a time, to prevent drying before you place the tiles. Hold the ¼-inch notched trowel at a 45-degree angle. Comb the mortar in straight lines. This method removes air pockets and gives a strong grip.
For extra security, apply a thin coat of mortar to the back of each tile, sometimes known as back-buttering, before placing it on the ceiling. This improves adhesion and reduces the risk of tiles detaching over time.
Step 3: Place the Tiles
Starting in the center of the ceiling, take the first tile and press it firmly into the mortar, twisting slightly as you apply pressure. This twisting motion enhances the bond between the tile and the adhesive. Avoid sliding tiles into place, as this can push mortar out of alignment and create an uneven surface.
As you continue placing tiles, work outward and use tile spacers between them to maintain consistent grout lines. If using large-format tiles, check alignment frequently with a laser level to prevent crooked rows.
Work in small sections and periodically step back to ensure that the tiles are even and properly spaced. If a tile appears misaligned, carefully adjust it before the mortar sets.
Step 4: Cut Tiles to Fit Around Fixtures
Shower ceilings often have light fixtures, ventilation fans, or showerheads, which require precise tile cuts. The key to clean and professional cuts is using the right tools and measuring accurately.
If your ceiling has showerheads, recessed lighting, or ventilation fans, you’ll need to cut tiles to fit around them. If you need to trim a tile to fit against a wall, use a wet saw for clean, straight cuts. If cutting around a circular fixture, such as a recessed light, use a diamond hole saw drill bit.
Step 5: Secure the Tiles & Prevent Slippage
The most common challenge is tile slipping as gravity works against you. If tiles shift before the mortar sets, it can create uneven grout lines and weak adhesion, leading to long-term failures.
To prevent tiles from slipping, use painter’s tape or wooden braces to hold them in place while drying. If the tiles are large or heavy, temporarily secure them with small strips of plywood or a tension rod placed against the ceiling.
Gravity works against the mortar, so it’s important to check each tile’s placement every few rows to ensure alignment. If you notice any sagging, gently press the tile back into place and reinforce it with additional supports.
Step 6: Let the Adhesive Cure
Patience is key in how to tile a ceiling shower successfully. Once all tiles are in place, the thin-set mortar needs time to fully cure before applying grout.
Let the tiles dry for at least 24 hours before touching them. Avoid using the shower or exposing the area to moisture during this time, as humidity can interfere with the drying process. Once the adhesive has completely set, inspect all tiles for stability. If any feel loose, apply additional adhesive and allow extra drying time.
After curing, remove any tile spacers and prepare for the final step—grouting the joints.
Step 7: Apply Grout and Seal the Tiles
Once the adhesive has fully cured, it’s time to grout the shower ceiling tiles.
Grout fills the gaps between tiles, and creates a watertight seal. This seal stops moisture from getting behind the tiles. It helps keep the tiles strong. Without this step, even a perfectly installed tile ceiling in shower spaces can develop mold and mildew over time.
- Mix the grout according to the manufacturer’s instructions until it has a smooth, peanut butter-like consistency.
- Use a rubber grout float to spread the grout diagonally over the tiles. Press it firmly into the gaps to make sure it covers fully.
- Wipe away excess grout using a damp sponge before it dries completely, being careful not to pull grout from the joints.
Allow the grout to cure for at least 24 hours before sealing. Once the grout fully cures, apply a penetrating grout sealer to protect against moisture and discoloration. If you've used natural stone tiles, apply a tile sealer as well to prevent staining and keep the surface water-resistant. Let the sealer dry completely for 48-72 hours before exposing the shower to moisture.
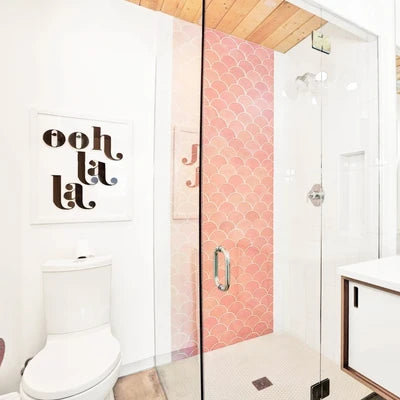
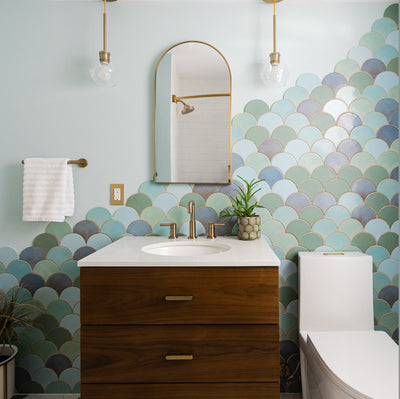
 Medium Moroccan Fish Scales - Deep Sea Blend
Interior Design - Elizabeth Bolognino
Photographer - Adam Kane Macchia
At least nine pairs of hands touch every handmade tile, and you can explore Mercury Mosaics’ artisan tile collections to experience true craftsmanship.
Common Ceiling Shower Tile Challenges and Fixes
Installing tile ceiling surfaces comes with unique challenges. You can prevent slipping tiles by using temporary supports and high-quality thin-set mortar. Grout dripping is common in overhead applications, but working in small sections and using non-sanded grout reduces mess. If tiles fall after installation, it is likely due to insufficient adhesive coverage or an unstable substrate.
Tiling a shower ceiling comes with unique challenges, but proper planning and technique can prevent most issues. Gravity, moisture, and improper adhesion lead to slipping tiles, grout mess, or even long-term water damage. Using high-quality materials, proper installation methods, and structural reinforcement helps ensure a lasting and secure tile shower ceiling.
- Tiles Slipping During Installation: Use painter’s tape or temporary bracing with wooden planks and back-butter each tile for extra grip.
- Tiles Falling After Installation: Apply a full layer of modified thin-set mortar and ensure the ceiling is backed with cement board, not drywall.
- Grout Dripping or Falling: Work in small sections, use non-sanded grout, and allow it to firm up before wiping excess away.
- Water Damage Behind Tiles: Prevent leaks by using a waterproof adhesive and epoxy grout for a watertight seal.
- Ceiling Can’t Support Tile Weight: Reinforce ceilings if needed, or choose lighter weight ceramic or porcelain tiles.
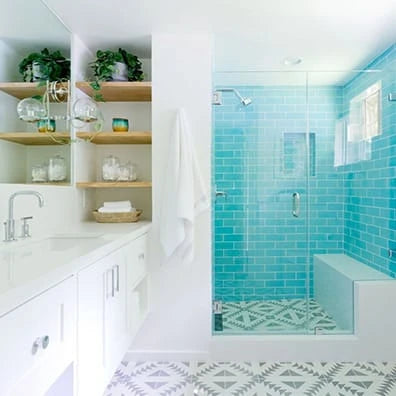
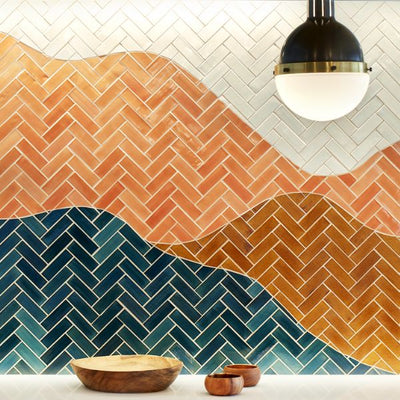
 Large Moroccan Fish Scale - Coastal Breeze
Find the perfect glaze color for your bathroom with Mercury Mosaics’ wide range of handcrafted tile finishes
Maintaining Your Tiled Shower Ceiling
Keeping your tile shower ceiling clean and well-maintained will have your bathroom tiles sparkling for years to come. Regular care prevents grout deterioration, mold growth, and water damage while keeping your tiles looking fresh. By following these simple steps, you’ll keep your tiled ceiling looking pristine while protecting it from long-term moisture issues.
- Clean regularly with a pH-neutral cleaner to prevent grout erosion and soap scum buildup.
- Ensure proper ventilation to reduce humidity and prevent mold or mildew.
- Inspect grout annually for cracks or wear, resealing it every 1-2 years to maintain a waterproof barrier.
Explore Shower Ceiling Tile From Mercury Mosaics
When it comes to tiling a shower ceiling, choosing high-quality materials is essential. Mercury Mosaics offers handcrafted ceramic tiles that are durable, water-resistant, and uniquely designed to add character to any bathroom. With their mesh-mounted tiles, installation is faster and easier without needing as much cutting and refining as individual tile laying.
Made with artisan craftsmanship that goes through nine pairs of hands from cutting the tiles to applying the final layers of high-quality glazes, trust that your shower will be beautiful and long-lasting.
If you’re ready to transform your shower ceiling, explore Mercury Mosaics' selection of handmade ceramic tiles. Have something special in mind for how to add tile to your shower ceiling? Work with our team to create the custom tile design you’ve always wanted to bring timeless beauty to your bathroom.